



How to Enable Incoming WhatsApp Calls (WhatsApp SIP Calling) in 3CX

Updated on September 30, 2026
3 min read
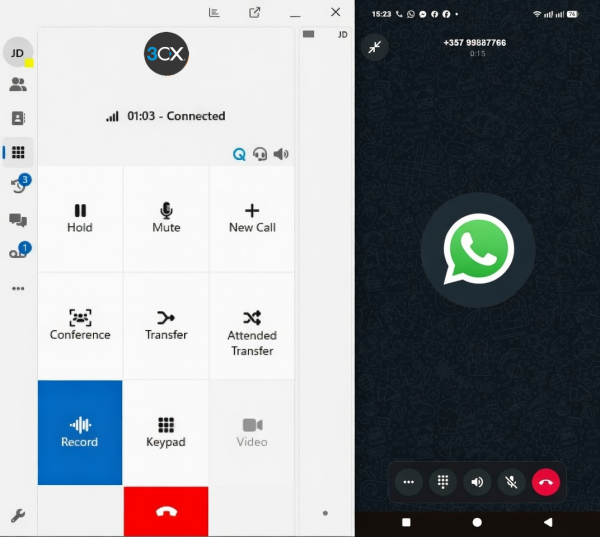
Since 3CX V20 Update 8, 3CX supports incoming (inbound) voice calls from WhatsApp, extending the previous WhatsApp integration that only supported text messaging (chat).
With this feature, your business WhatsApp number can be registered as a SIP Trunk in 3CX, so incoming voice calls through WhatsApp can be routed directly to:
- An Extension (a staff member’s internal number)
- A call Queue
- An IVR / Digital Receptionist
- An AI Agent
Important note: Currently this feature only supports inbound calls from WhatsApp to 3CX. Outbound calls from 3CX to WhatsApp are not yet supported.
Prerequisites #
Before you start, make sure you already have:
- An active (Live) WhatsApp Application on the Meta for Developers Portal, complete with messaging permission for the business number you want to enable.
- The Phone Number ID and User Access Token for that WhatsApp number.
- If WhatsApp Messaging is already active in your 3CX, both of these values can be obtained directly from Admin Console → Voice & Chat → [Your WhatsApp Messaging Trunk].
- If you’ve never enabled WhatsApp on 3CX before, first follow the Configuring WhatsApp guide to obtain the Phone Number ID and User Access Token.
- A third-party tool such as Postman, since enabling SIP isn’t currently available through Meta’s UI portal — it has to be done via a request to the Meta Graph API.
For multiple numbers: If you want to integrate more than one WhatsApp number, each number needs its own WhatsApp Application on Meta for Developers, and all of the steps in this guide must be repeated for each number.
Step 1 — Create a WhatsApp Application #
- If WhatsApp Messaging is already configured in your 3CX, skip this step and get the Phone Number ID and User Access Token from: Admin Console → Voice & Chat → Your WhatsApp Messaging Trunk
- If not, follow the WhatsApp Integration Guide to create the application and obtain both values.
Step 2 — Enable SIP on Your WhatsApp Number #
Send the following POST request to the Meta Graph API using curl or Postman.
curl -X POST "https://graph.facebook.com/v24.0/<PHONE_NUMBER_ID>/settings"
-H "Authorization: Bearer <YOUR_ACCESS_TOKEN>"
-H "Content-Type: application/json"
-d '{
  "calling": {
    "status": "ENABLED",
    "callback_permission_status": "ENABLED",
    "call_icon_visibility": "DEFAULT",
    "srtp_key_exchange_protocol": "SDES",
    "sip": {
      "status": "ENABLED",
      "servers": [
        {
          "hostname": "<YOUR_3CX_FQDN>",
          "port": <YOUR_SIPS_PORT>
        }
      ]
    }
  }
}'
Replace the following with your own data:
| Placeholder | Description |
|---|---|
<PHONE_NUMBER_ID> | Phone Number ID from Step 1 |
<YOUR_ACCESS_TOKEN> | User Access Token from Step 1 |
<YOUR_3CX_FQDN> | Your 3CX PBX’s FQDN, e.g.: mypbx.3cx.com |
<YOUR_SIPS_PORT> | Usually 5061 if your PBX uses the default port |
If the request succeeds, you’ll get this response:
{"success":true}
You can also import the curl command above directly into Postman via File → Import.
Step 3 — Verify the SIP Configuration #
Send the following GET request to confirm the SIP configuration is correct:
curl -X GET "https://graph.facebook.com/v17.0/<PHONE_NUMBER_ID>/settings?fields=calling&include_sip_credentials=true"
-H "Authorization: Bearer <YOUR_ACCESS_TOKEN>"
Example response on success:
{
  "calling": {
    "status": "ENABLED",
    "call_icon_visibility": "DEFAULT",
    "callback_permission_status": "ENABLED",
    "srtp_key_exchange_protocol": "SDES",
    "sip": {
      "status": "ENABLED",
      "servers": [
        {
          "app_id": 112233445566778,
          "hostname": "pbx.3cx-example.com",
          "port": 5061,
          "sip_user_password": "aabbccddeeffgghhiijjkkllmmnnoopp"
        }
      ]
    }
  },
  "storage_configuration": {
    "status": "DEFAULT"
  }
}
Step 4 — Enable Call Settings in WhatsApp Business Manager #
- Open WhatsApp Business Manager.
- Click Phone Numbers, then select your WhatsApp number.
- If Phone Numbers isn’t visible, click All tools first.
- Open the Call Settings tab, and make sure the following options are enabled:
- ✅ Allow voice calls
- ✅ Allow callbacks
- ✅ Display call buttons
Step 5 — Create a SIP Trunk in 3CX #
- Download the WhatsApp template provided by 3CX.
- Go to 3CX Admin Console → Admin → Advanced → Templates → Provider Templates.
- Click Import Provider, select the template file you downloaded, then click Import.
- Fill in the following configuration:
- Name — give your new WhatsApp SIP Trunk a name.
- Default route — set the default destination for incoming WhatsApp calls (extension/queue/IVR/AI Agent).
- Uncheck the Create an outbound rule option (since this feature is inbound-only).
- Main Trunk Number — fill in your WhatsApp number.
- Leave the other fields at their default values.
- Click Save.
Once saved, your 3CX system will be ready to receive incoming calls from that WhatsApp number and forward them to the destination you specified.
Alternative: Manually Creating a Generic SIP Trunk #
If you’d rather not use the template, you can manually create a Generic SIP Trunk with the following configuration:
| Setting | Value |
|---|---|
| Authentication Type | IP-based |
| Host | wa.meta.vc |
| Port | Auto discovery |
| Transport Protocol | TLS |
| SRTP Mode | Enforced |
| Codecs | OPUS |
Flow Summary #
Incoming WhatsApp Call
        │
        ▼
  WhatsApp SIP Trunk (3CX)
        │
        ▼
 Extension / Queue / IVR / AI Agent
Frequently Asked Questions (FAQ) #
Q: Can I make outbound calls to WhatsApp from 3CX?
A: Not yet. The current implementation only supports inbound calls from WhatsApp into 3CX.
Q: Can I enable SIP directly from the Meta dashboard?
A: Not yet. Enabling SIP can currently only be done via an API request (e.g. using Postman), not through Meta’s portal interface.
Q: What if I have more than one business WhatsApp number?
A: Each WhatsApp number needs its own separate WhatsApp Application on Meta for Developers, and the entire process (Steps 1–5) must be repeated for each number.