



Guide to Integrating Odoo CRM with 3CX

Updated on September 30, 2026
3 min read
Good news for Odoo CRM and 3CX users! The update in 3CX V.20 Update 10 lets 3CX integrate natively with Odoo CRM. 3CX now provides a direct integration with Odoo CRM through the 3CX CRM API.
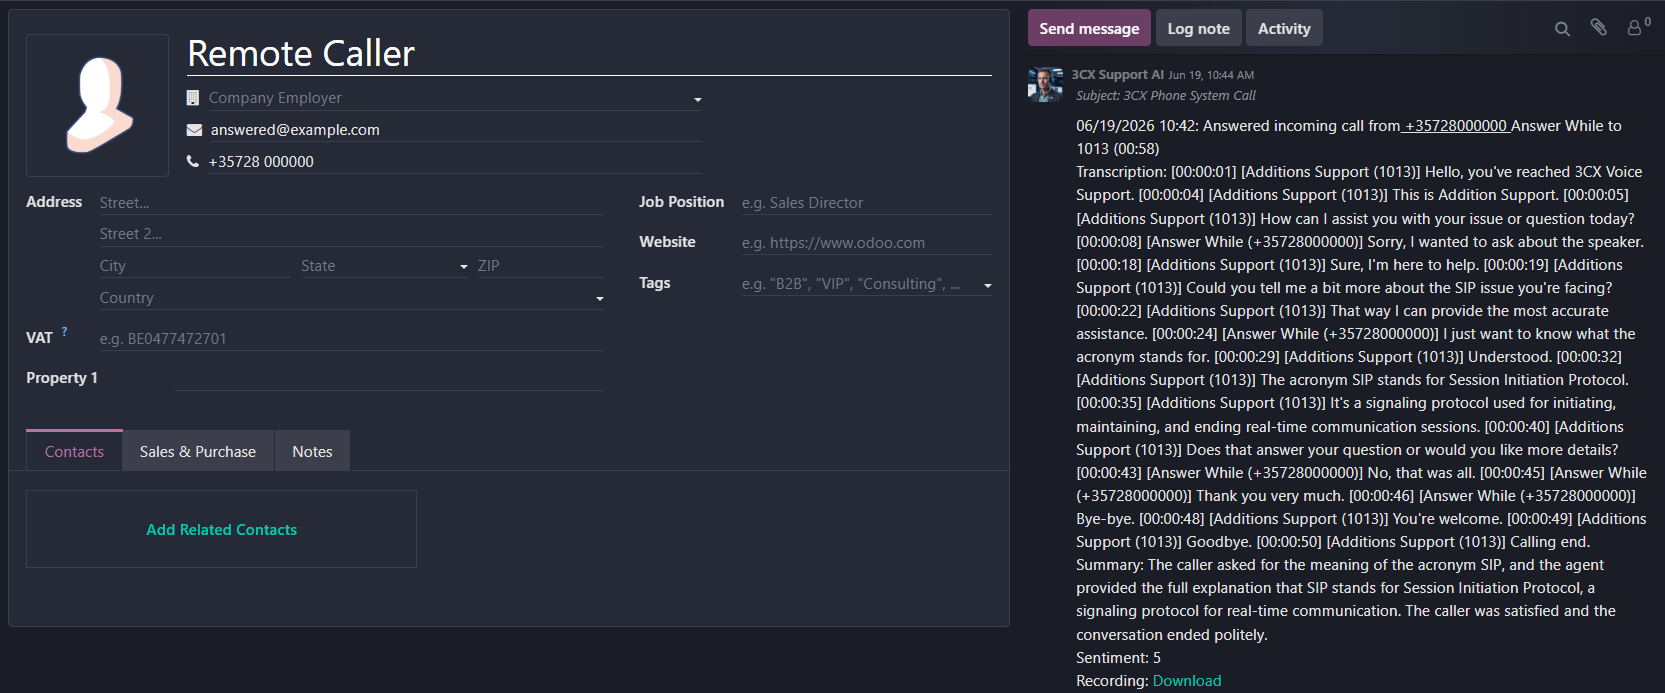
This integration brings several key features that make life easier for both sales and IT support teams:
- Caller ID to Contact Name — every incoming call automatically triggers a contact lookup in Odoo, so the caller’s name appears directly instead of just their number.
- Contact Search in Odoo — searching for a name in the 3CX Web Client can be done by Name, Number, or Email, and supports both individual and company contacts.
- Call & Chat Journaling — call and conversation history is automatically saved to the Odoo Contact Card as a CRM record.
- New Contact Creation — if a call comes in from an unrecognized number, the user can create a new contact directly from the 3CX client.
- Click to Call — calls can be placed directly from within Odoo using the 3CX Click2Call browser extension, available for Google Chrome and Microsoft Edge.
Here are the complete steps to set up this integration.
Step 1: Configuration in Odoo #
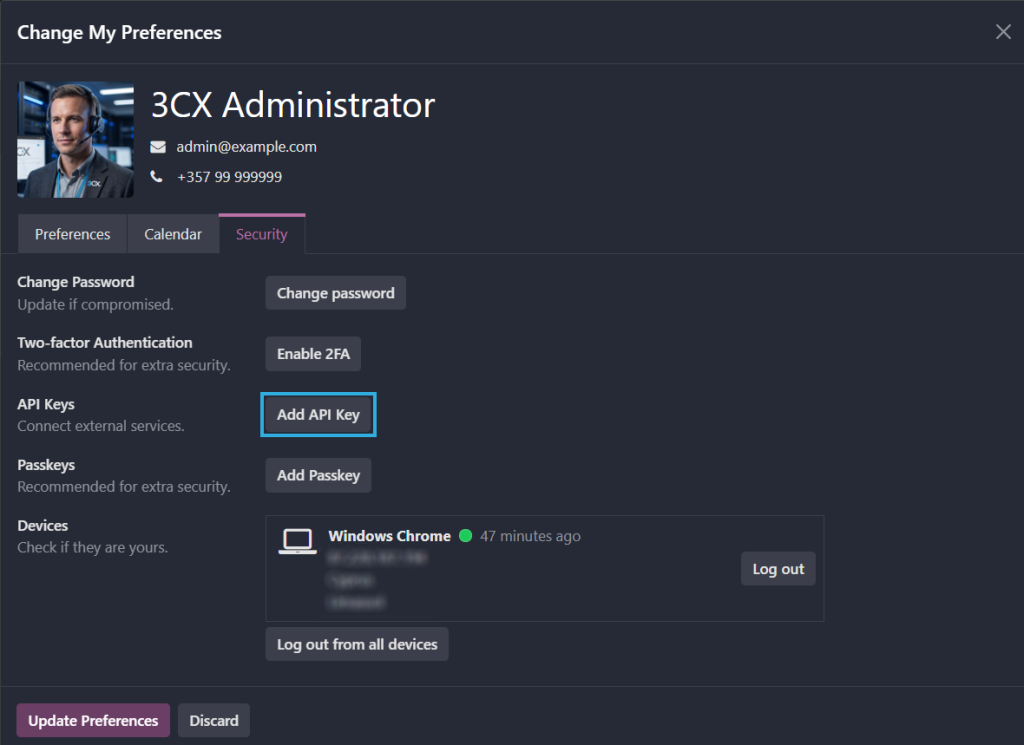
Before configuring 3CX, you first need to prepare an API Key on the Odoo side.
- Log in to your Odoo CRM account.
- Click your profile picture, then select My Preferences.
- Open the Security tab.
- Click the Add API Key button.
- Give the new API Key a name and set its expiration.
- Click Generate key.
- Copy and store the API Key somewhere safe — it will only be shown once.
- Click Done.
Also make a note of your Odoo instance’s Database name (usually the same as the hostname of your Odoo FQDN). If you’re not sure of the database name, here’s how to find it:
- Click your profile picture, then select My Databases.
- Log in again if prompted.
- Note down your instance’s database name.
Step 2: Configuration in 3CX #
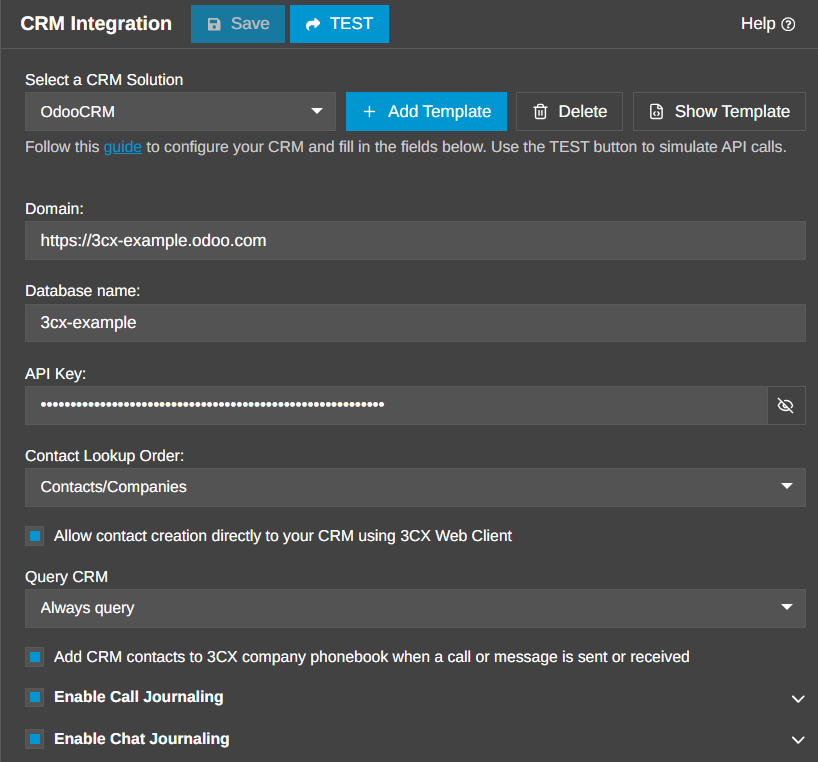
Once your API Key and database name are ready, continue the setup on the 3CX side:
- Go to Admin > Integrations > CRM.
- Select OdooCRM from the dropdown list.
- Enter the following information:
- Odoo Domain URL (example: https://3cx-example.odoo.com)
- Odoo Database name
- Odoo API Key
- Click Save.
Step 3: Configuring Call & Chat Journaling #
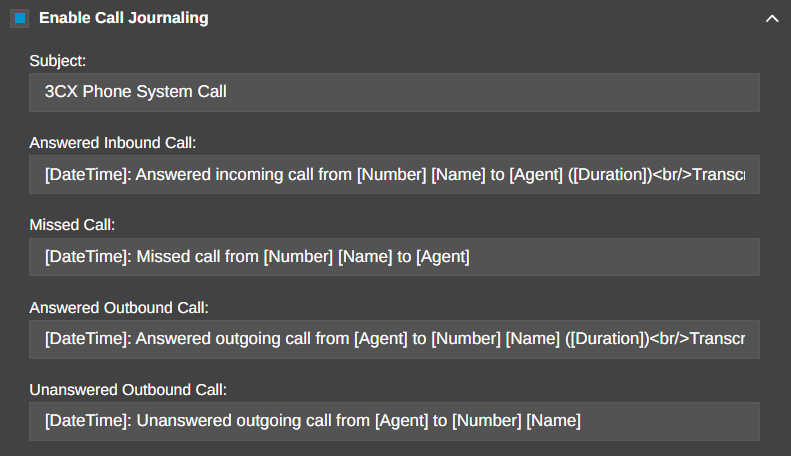
For external calls to be logged correctly, the caller’s phone number needs to match a number stored in an Odoo contact. This lets 3CX map an incoming call to the correct contact in Odoo.
For call logging (Call Journaling):
Enable the Enable Call Journaling option, then configure the following parameters:
| Parameter | Description |
| Call Subject | The call’s subject line |
| Answered Inbound Call | Description for an answered inbound call |
| Missed Call | Description for an unanswered call |
| Answered Outbound Call | Description for an answered outbound call |
| Unanswered Outbound Call | Description for an unanswered outbound call |
You can use variables in these parameters, written in the format [variable_name] — for example, the external number is written as [Number].
For chat logging (Chat Journaling):
If you’d also like chats to be logged to the CRM, enable Enable Chat Journaling. You can also customize the Chat Subject, including using variables like [Number].
Keep in mind that for an external chat to be logged into Odoo, the other party’s email address (for Web Chat) or phone number (for SMS/WhatsApp) needs to match the data already stored in an Odoo contact.

Step 4: Configuring Contact Matching #
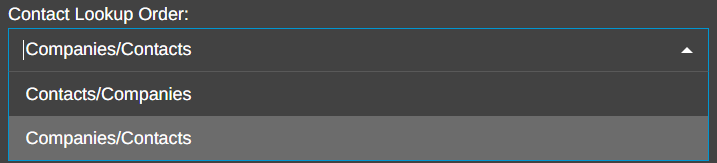
On the Odoo settings page in 3CX, you can decide whether contact matching should be attempted first against a regular Contact record or a Company record in Odoo.
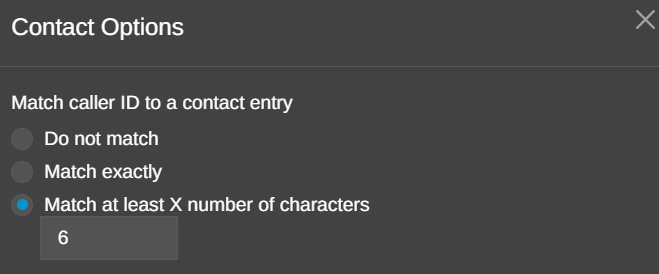
There are also two phone number matching methods for calls, configurable under Admin > System > Phonebook > Options:
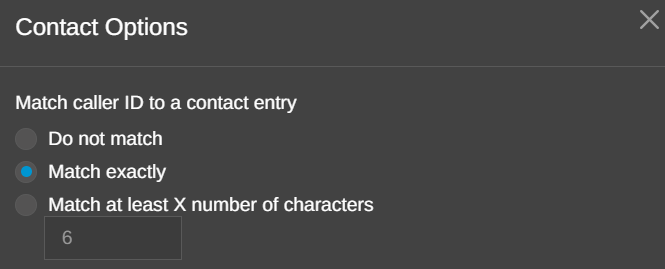
- Match Exactly — use this option if all of your contacts already use the full E164 format, both when stored and when making/receiving calls. This method guarantees 100% match accuracy.
- Match at least X number of characters — use this option if your calls use a mix of formats, such as local dialing, E164, or other international formats. The ideal number of characters depends on the local numbering scheme used in your region.
Step 5: Configuring New Contact Creation #
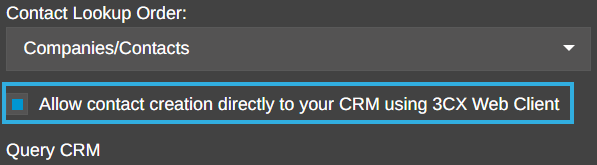
If you want the system to automatically create a new CRM contact when a call comes in from an unrecognized number (not found in either 3CX or the CRM), enable the Allow contact creation directly to your CRM using 3CX Web Client option.
With this option enabled, whenever a caller’s number can’t be matched to any contact, the 3CX Web Client will display a dialog that lets the user fill in the new contact’s details right there.
Closing Notes #
By following the five steps above, your 3CX phone system and Odoo CRM will be connected automatically — from recognizing caller names, to logging communication history, to instantly creating new contacts. This integration is a huge help for teams that rely on centralized customer data without needing to switch between apps while handling calls or chats.
For other CRM integration needs, 3CX also provides similar guides for ConnectWise, HubSpot, Jetpack CRM, Vtiger, Microsoft 365, as well as database integrations for Microsoft SQL Server, MySQL, and PostgreSQL.